Auto Terrain allows the user to create a full terrain sprite sheet from a single tile. Ed automatically creates cut offs around the corners, and makes outer and inner corners round based on the values given by the user.
Additionally, the user can override different sides, or stamp other sprites on top of different corners. For instance, vegetation and moss can be stamped on the left and right sides, and shadows can be put on the bottom of the terrain.
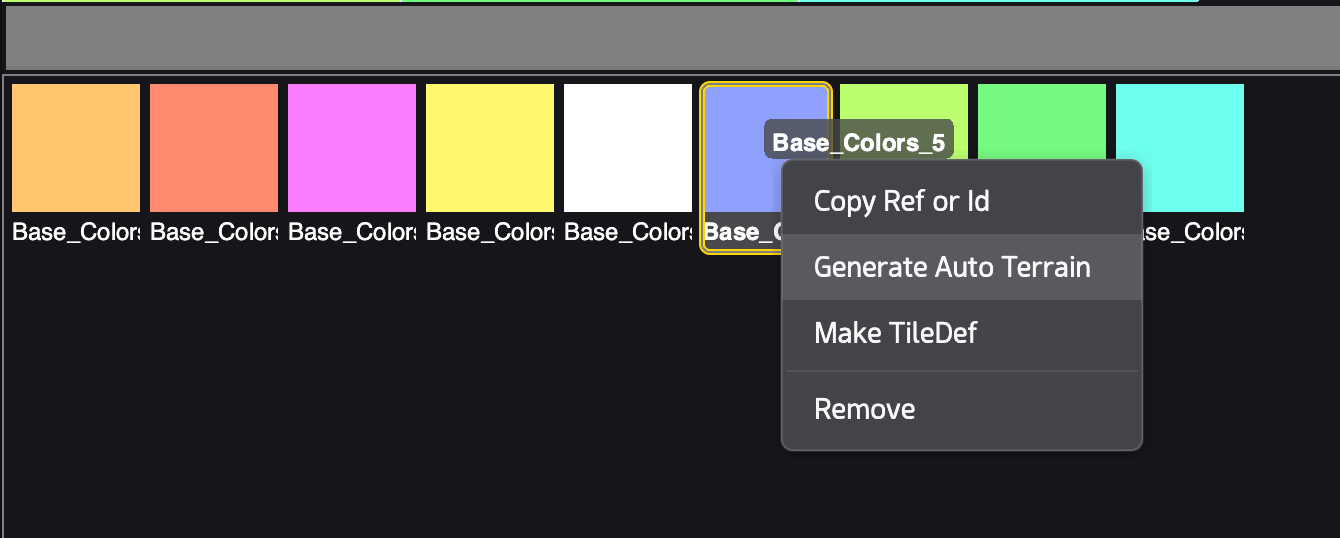
To generate Auto Terrain from a single sprite, right click on the sprite in the sprite sheet editor, and click Generate Auto Terrain.
This create a new Auto Terrain sprite sheet:
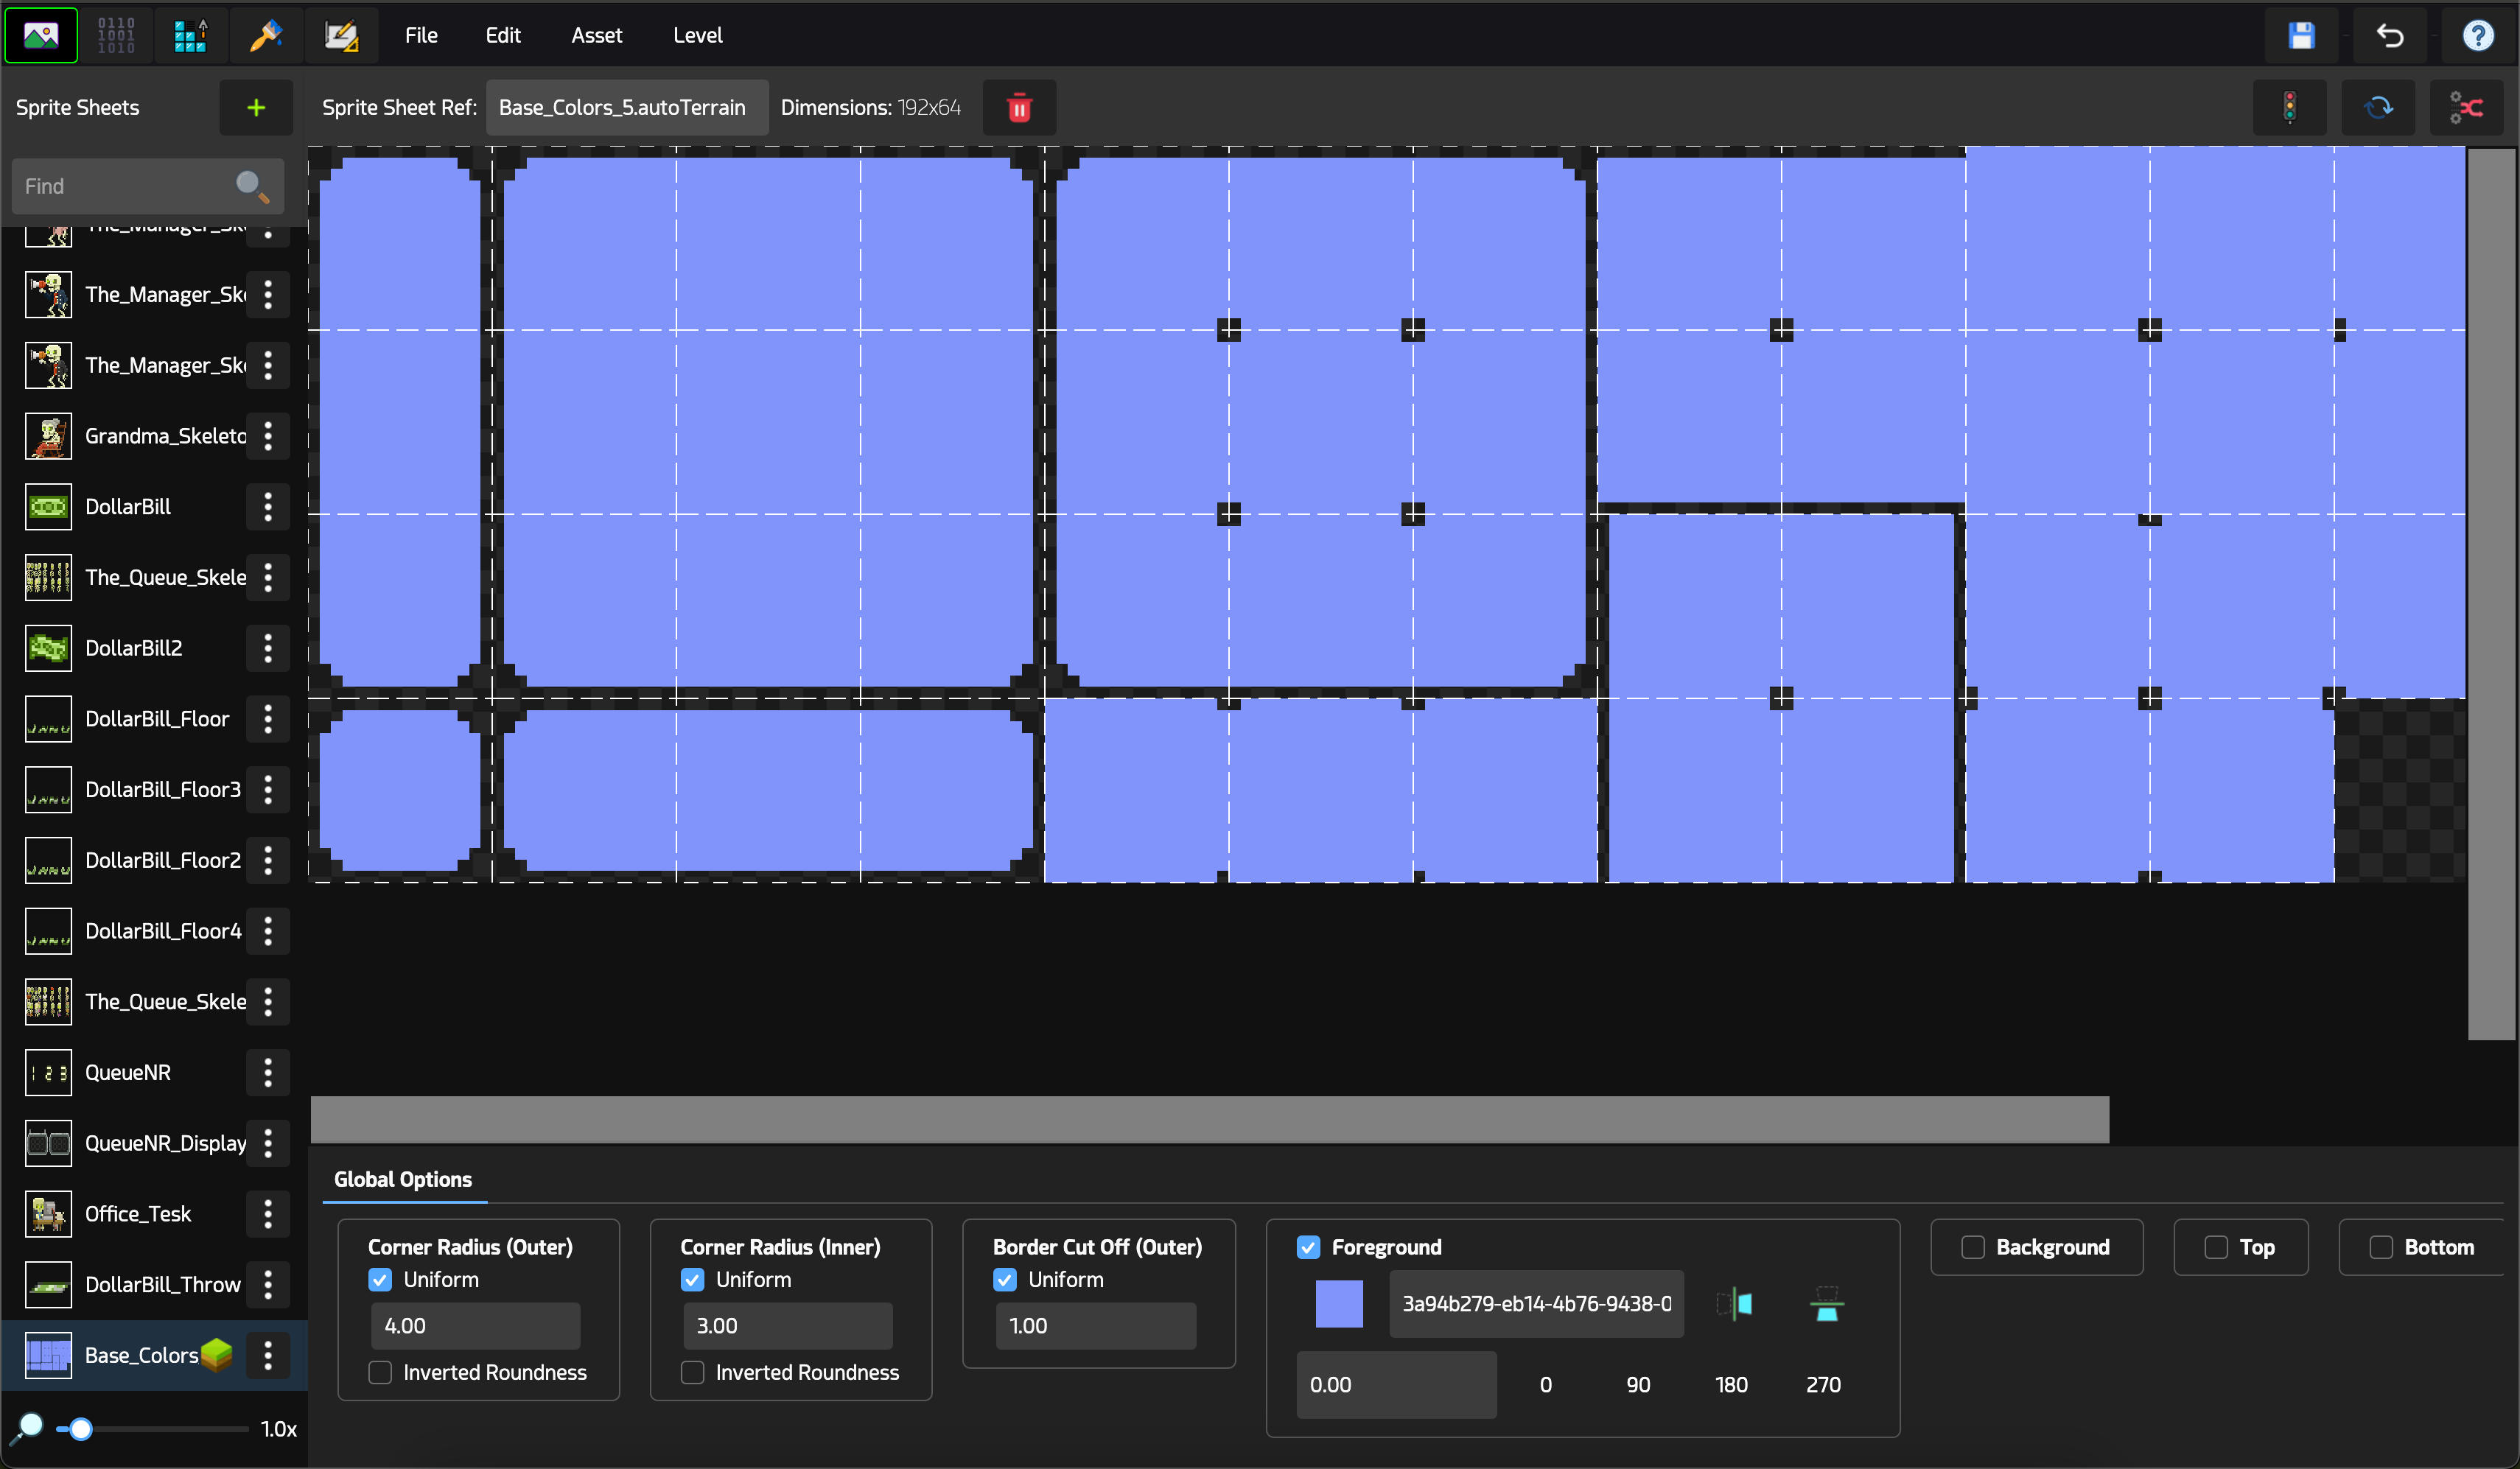
Auto Terrain sprite sheets are marked with a green and brown terrain block icon in front of them. The global Auto Terrain settings are shown on the bottom of the editor.
The first three sections adjust the values for inner and outer corner radii, as well as the cut off thickness around the edges. To set different values for each edge, uncheck the Uniform checkbox.
You can change the sprite used for the foreground part of the tiles in the Foreground section. This box also offers controls for horizontal and vertical flips, and control on the rotation of the sprite.
Optionally, you can also set a sprite for the background of the tiles, and stamp other sprites on the top, bottom, left and right sides.
Each tile can be individually overridden with different looks. Simply click on the tile you want to edit, and on the bottom adjust the “Sprite Override Options” values.
A Rule Brush is automatically generated when the Auto Terrain was created, and all updates to the terrain are instantly reflected on the level.