Ed’s Sprite Sheet editor is the first step in the pipeline of tile editing in Ed. It can be accessed by pressing F1 or the first tab on the primary tab bar.

The Sprite Sheet editor allows users to import and manage all the image files (sprite sheets,) as well as to create sprites*, that can later be used as textures or animation frames on tiles.
* Sprites are whole or sub-images of sprite sheets, which are the image files that are imported in Ed.
The Sprite Sheet editor view is split into the following panels:
- On the left, the list of existing sprites, as well as a search box and a button to import image files as sprite sheets.
- On the right, the sprite sheet editor for the selected sprite sheet file.
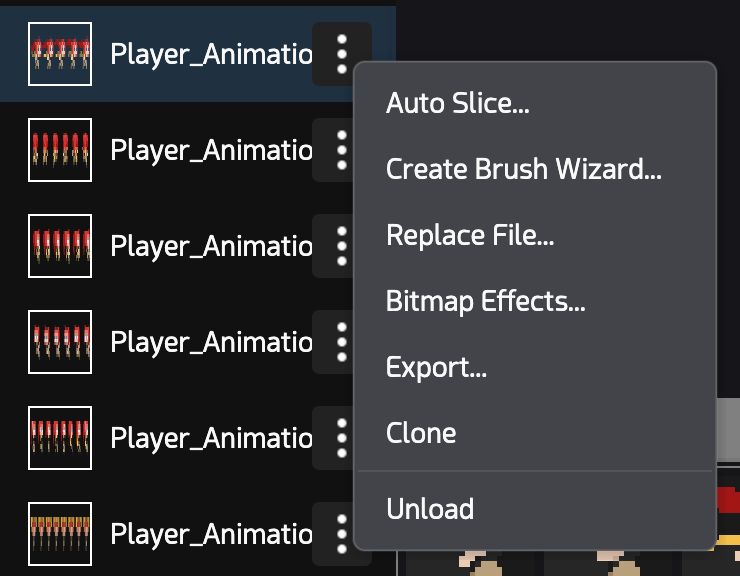
In front of each sprite sheet file, there is a three dots button that opens a context menu containing various actions related to the selected sprite sheet:
- Auto Slice: Open the sprite sheet Auto Slice dialog box which helps automate slicing of sprite sheets into sprites based on different parameter types, such as: The number of rows and columns, or sprite width and height, or a pre-defined pattern of terrain rule brush. It also supports padding and gaps between sprites in the sprite sheet.
- Create Brush Wizard: Creates or updates rule brushes based on marked rules on sprites.
- Replace File: Replaces the underlying image file of the sprite sheet without affecting the logical definitions of already existing sprites. This assumes the new image file has the same dimensions as the previous one.
- Bitmap Effects: Allows users to add various bitmap effects to the original sprite sheet image, such as: Remove key color (transparency), Tint, Brightness and Contrast, Saturation and others.
- Export: Saves the sprite sheet as a PNG file.
- Clone: Duplicates the sprite sheet and imports the duplicate into the project.
- Unload: Removes the sprite sheet and its sprites from the project.
Sprite sheets can have multiple types:
- Basic
- Auto Terrain
- Level
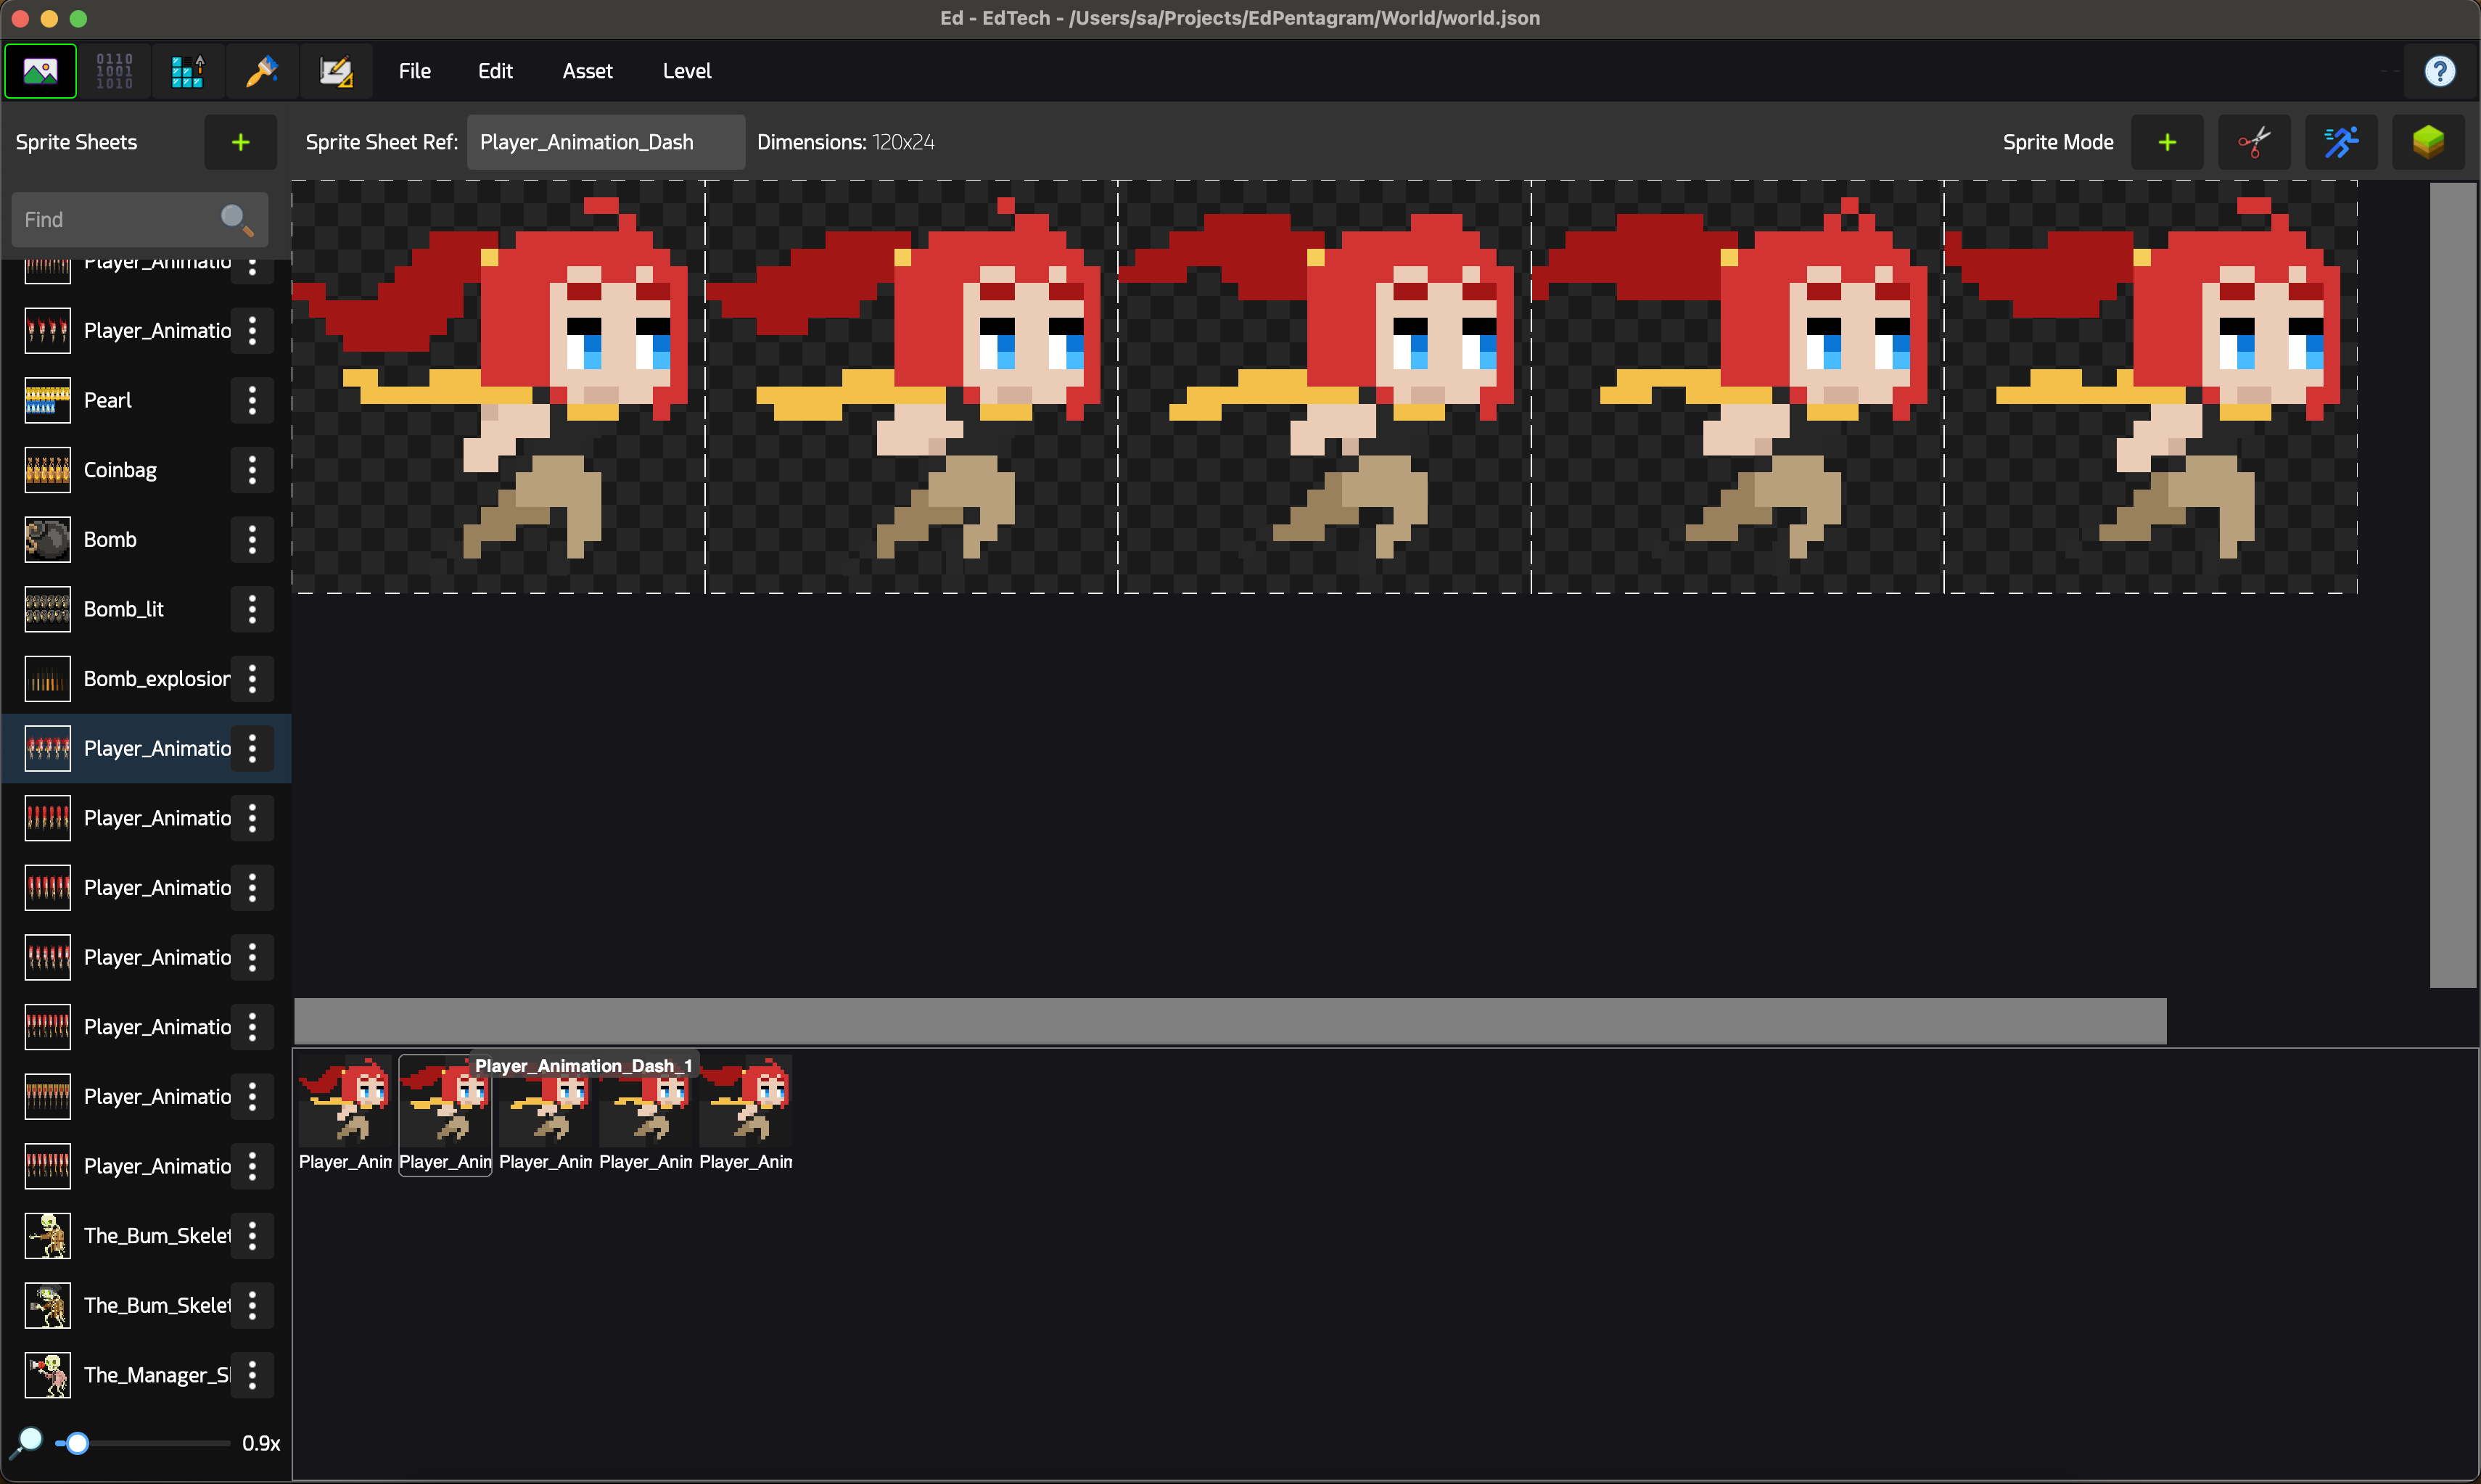
Basic sprite sheets are the ones that point to an image file, and on which Sprites can be created. When a Basic sprite sheet is selected, the right side looks like this:

On the top left corner, the Ref for the sprite sheet can be set. Ref is a friendly alias that can be used to point to an asset in Ed, and comes in handy when asset swapping needs to take place.
The dimensions of the sprite sheet in pixels are shown in front of Ref. On the other corner, there is a tool bar with multiple functions:

The Plus button is used to create a new sprite. When a new sprite is created, its size is set to fill the whole sprite sheet by default, and afterwards, the size can be changed either by dragging the corners of the bounding box visually, or by entering the coordinates and size of the sprite manually.
The Scissors button opens the Auto Slice Dialog. Auto Slice allows you to quickly slice a sprite sheet into multiple sprites.
The third button (New TileDef,) opens the New TileDef from Sprites dialog, which can be used to quickly create animations or single-frame TileDefs from the sprites in the current sprite sheet.
The forth button toggles between Sprite Mode and Terrain Mode. When Terrain Mode is enabled, the editor changes to this view, which allows terrain rule brushes to be created from the sprite sheet editor:
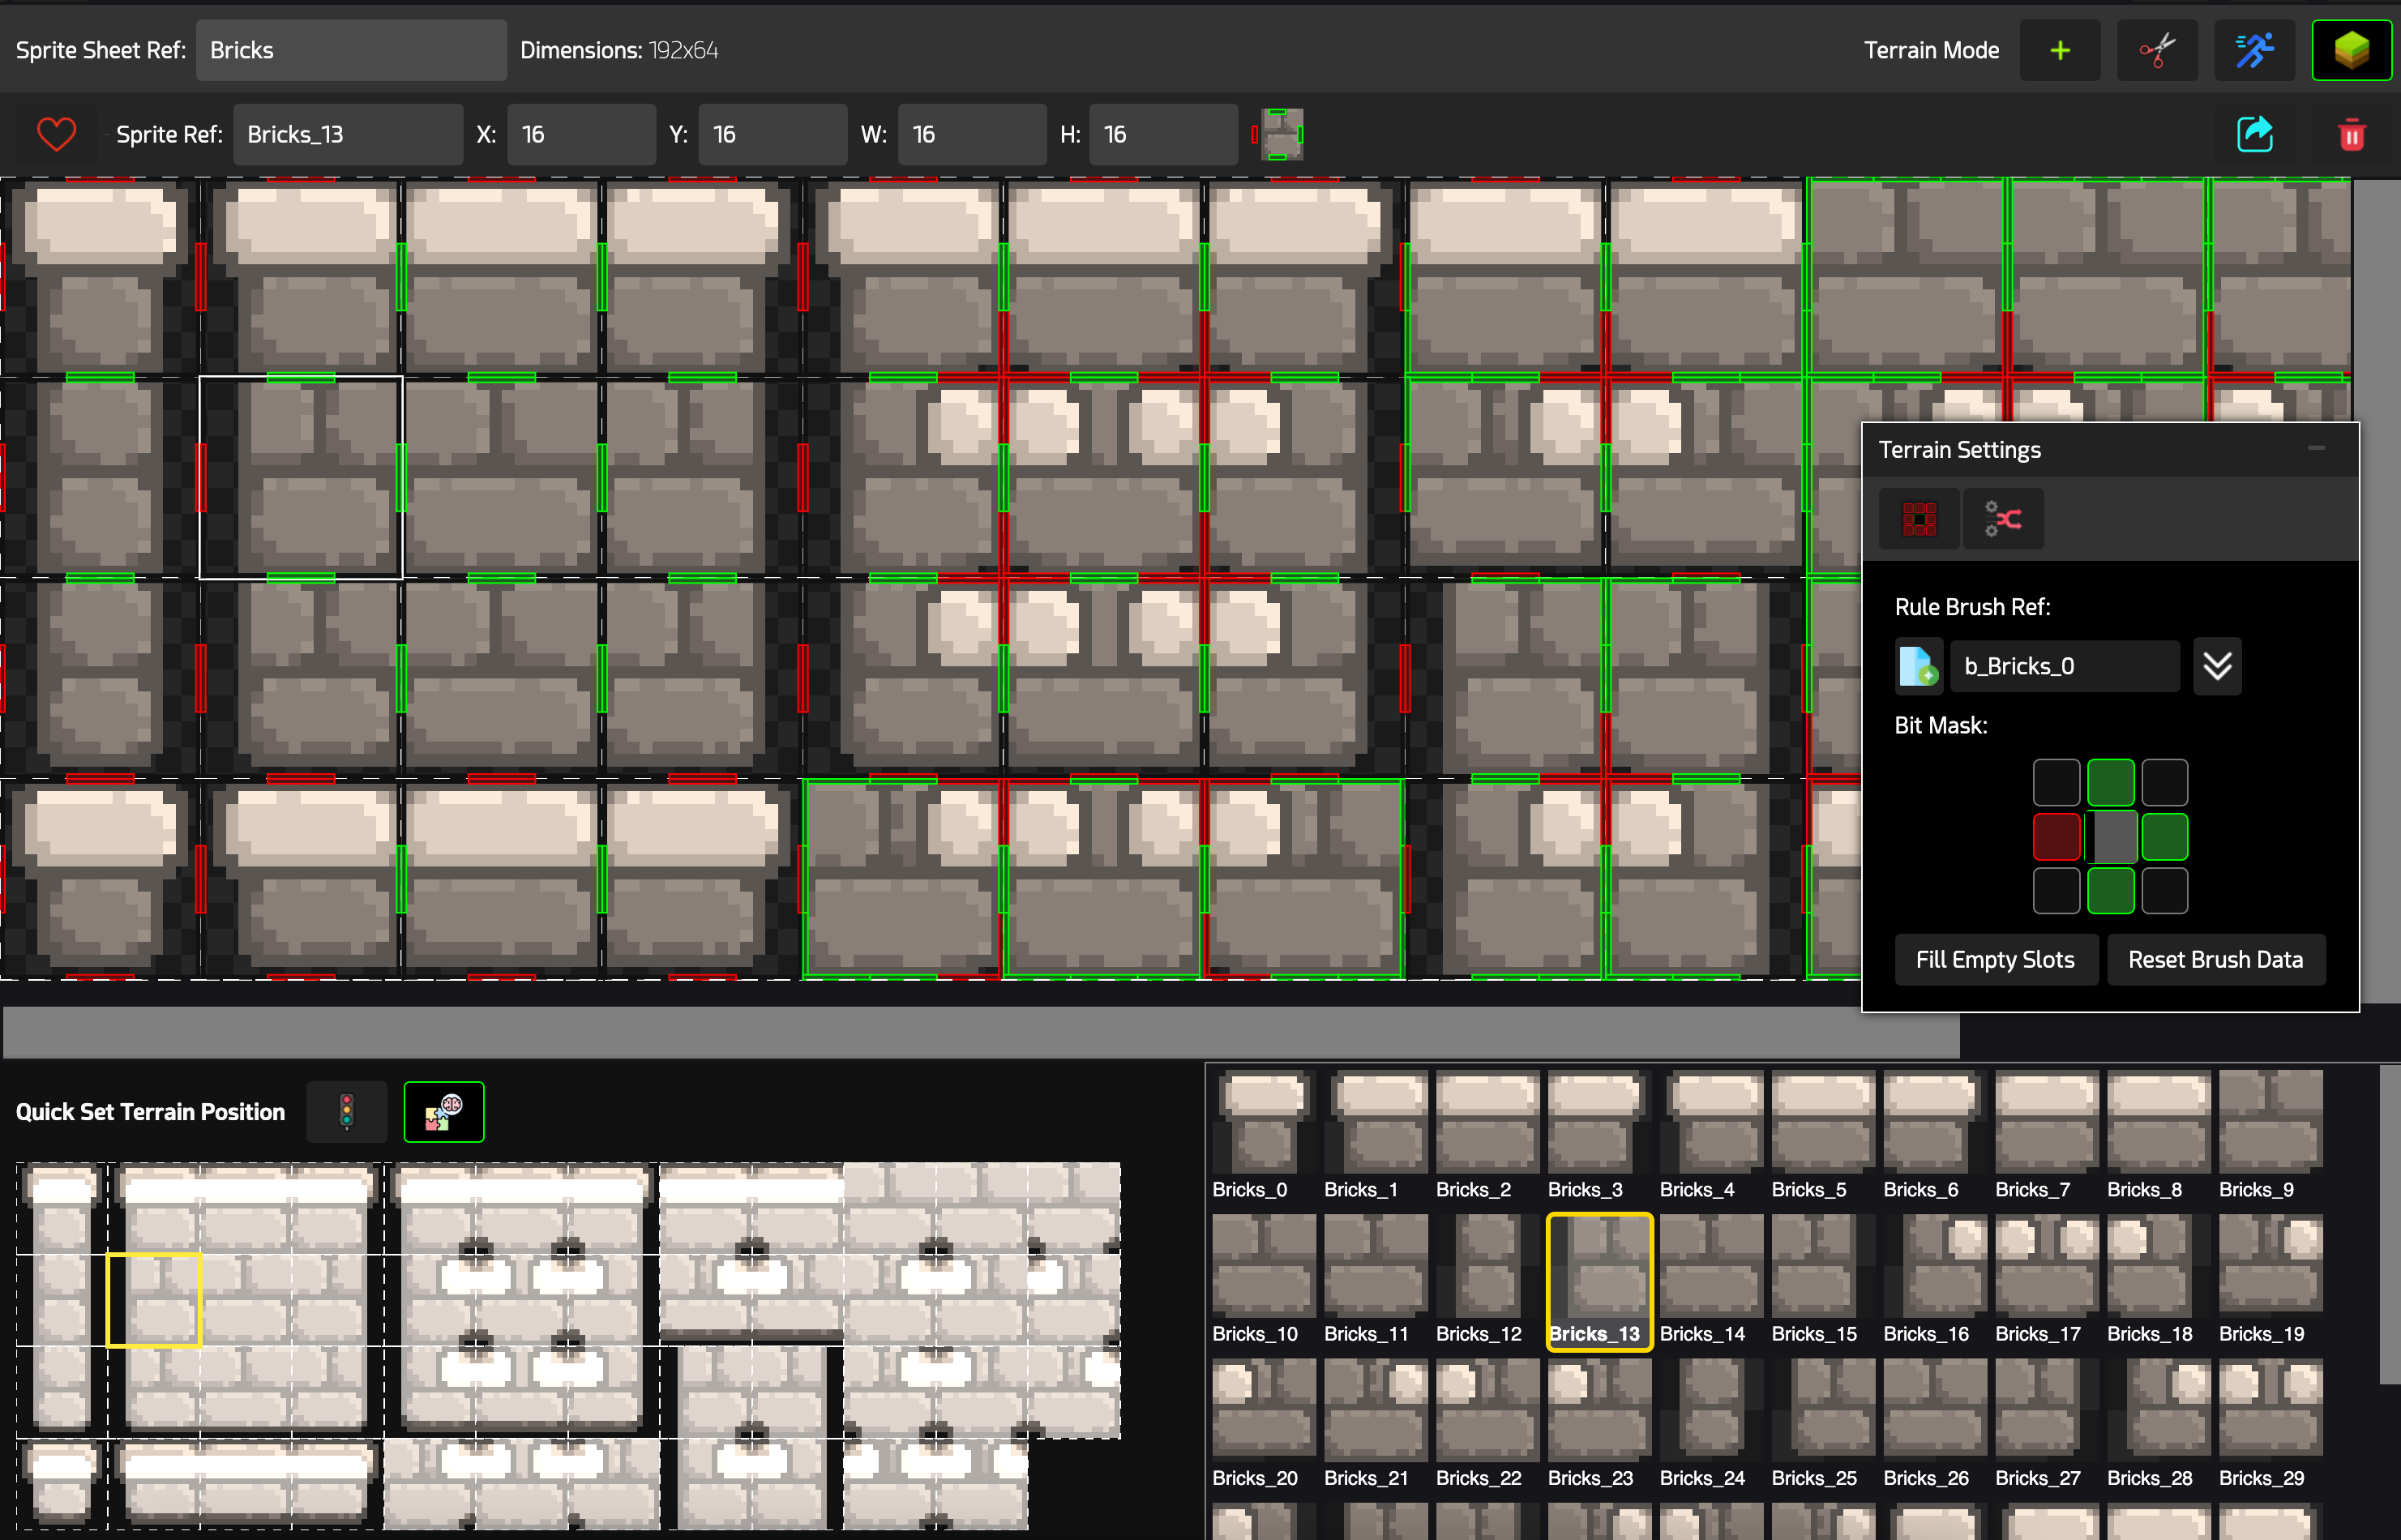
To use Quick Terrain, first click on a sprite, give it a Rule Brush Ref, and then click on one of the 47 rule positions on the Quick Set Terrain Position panel. The traffic lights button toggles the visibility of the bit mask presets for each rule. For more granular control, you can manually set the bit mask by clicking on the 9 corners on the Bit Mask section.
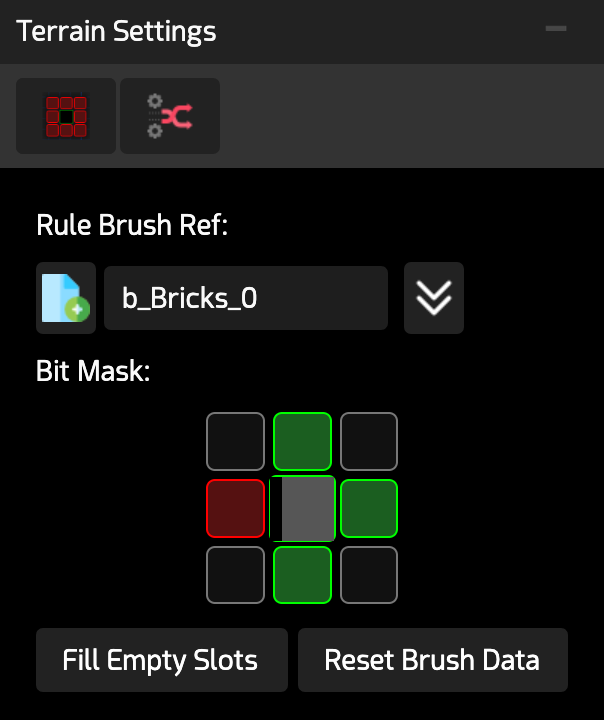
- Red means no tiles of the same rule brush should be in that corner.
- Green means tiles of the same rule brush should exist in that corner.
- Gray means do not care.
The Fill Empty Slots fills in the current sprite for all remaining unassigned rule slots in the 47-rule terrain. The Reset Brush Data resets all slots for the selected rule brush.
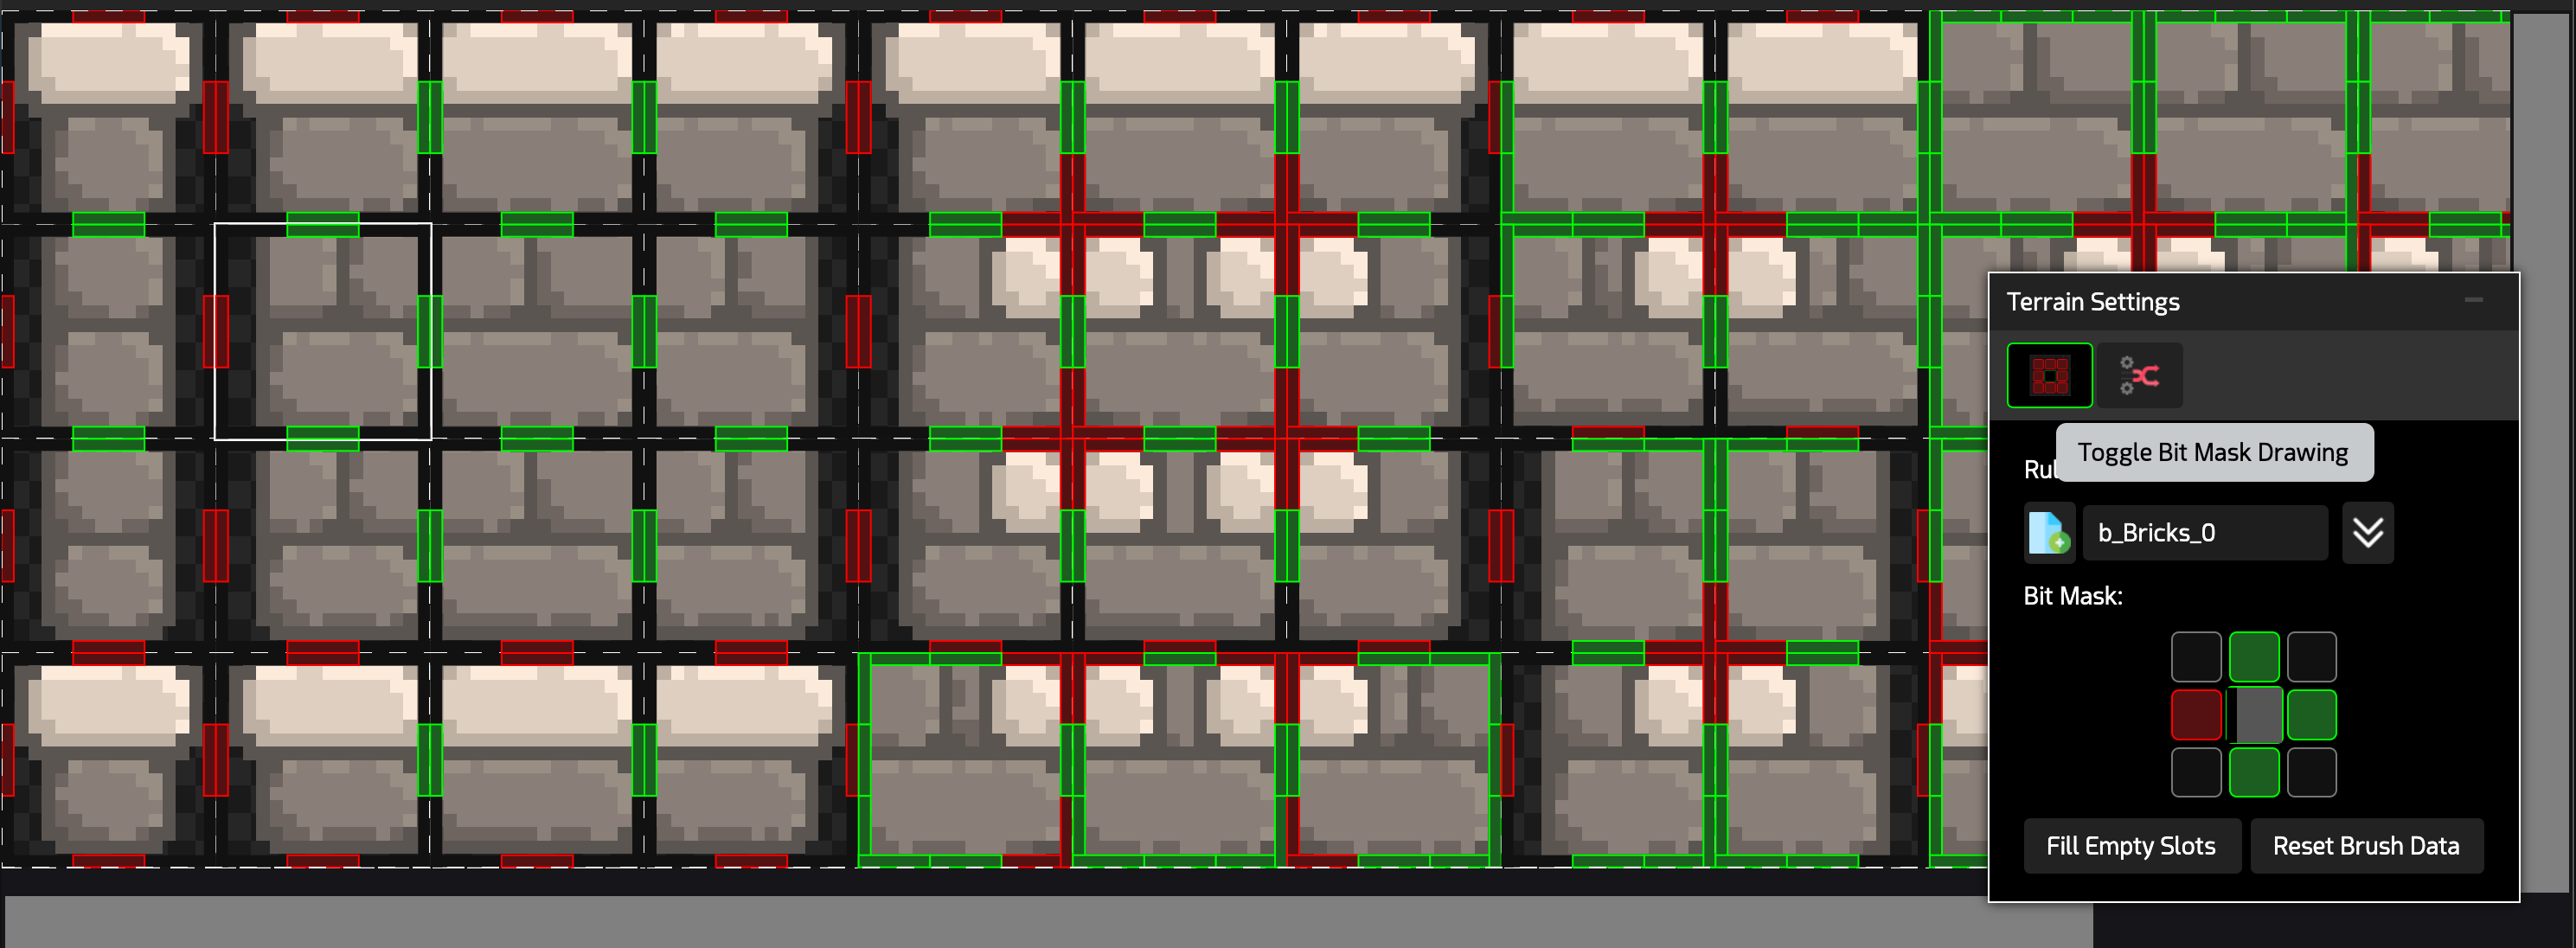
You can also quickly paint bit masks by turning on Toggle Bit Mask Drawing, and using left-click, middle-click or right click on the sprites and dragging them along to paint bit mask values:
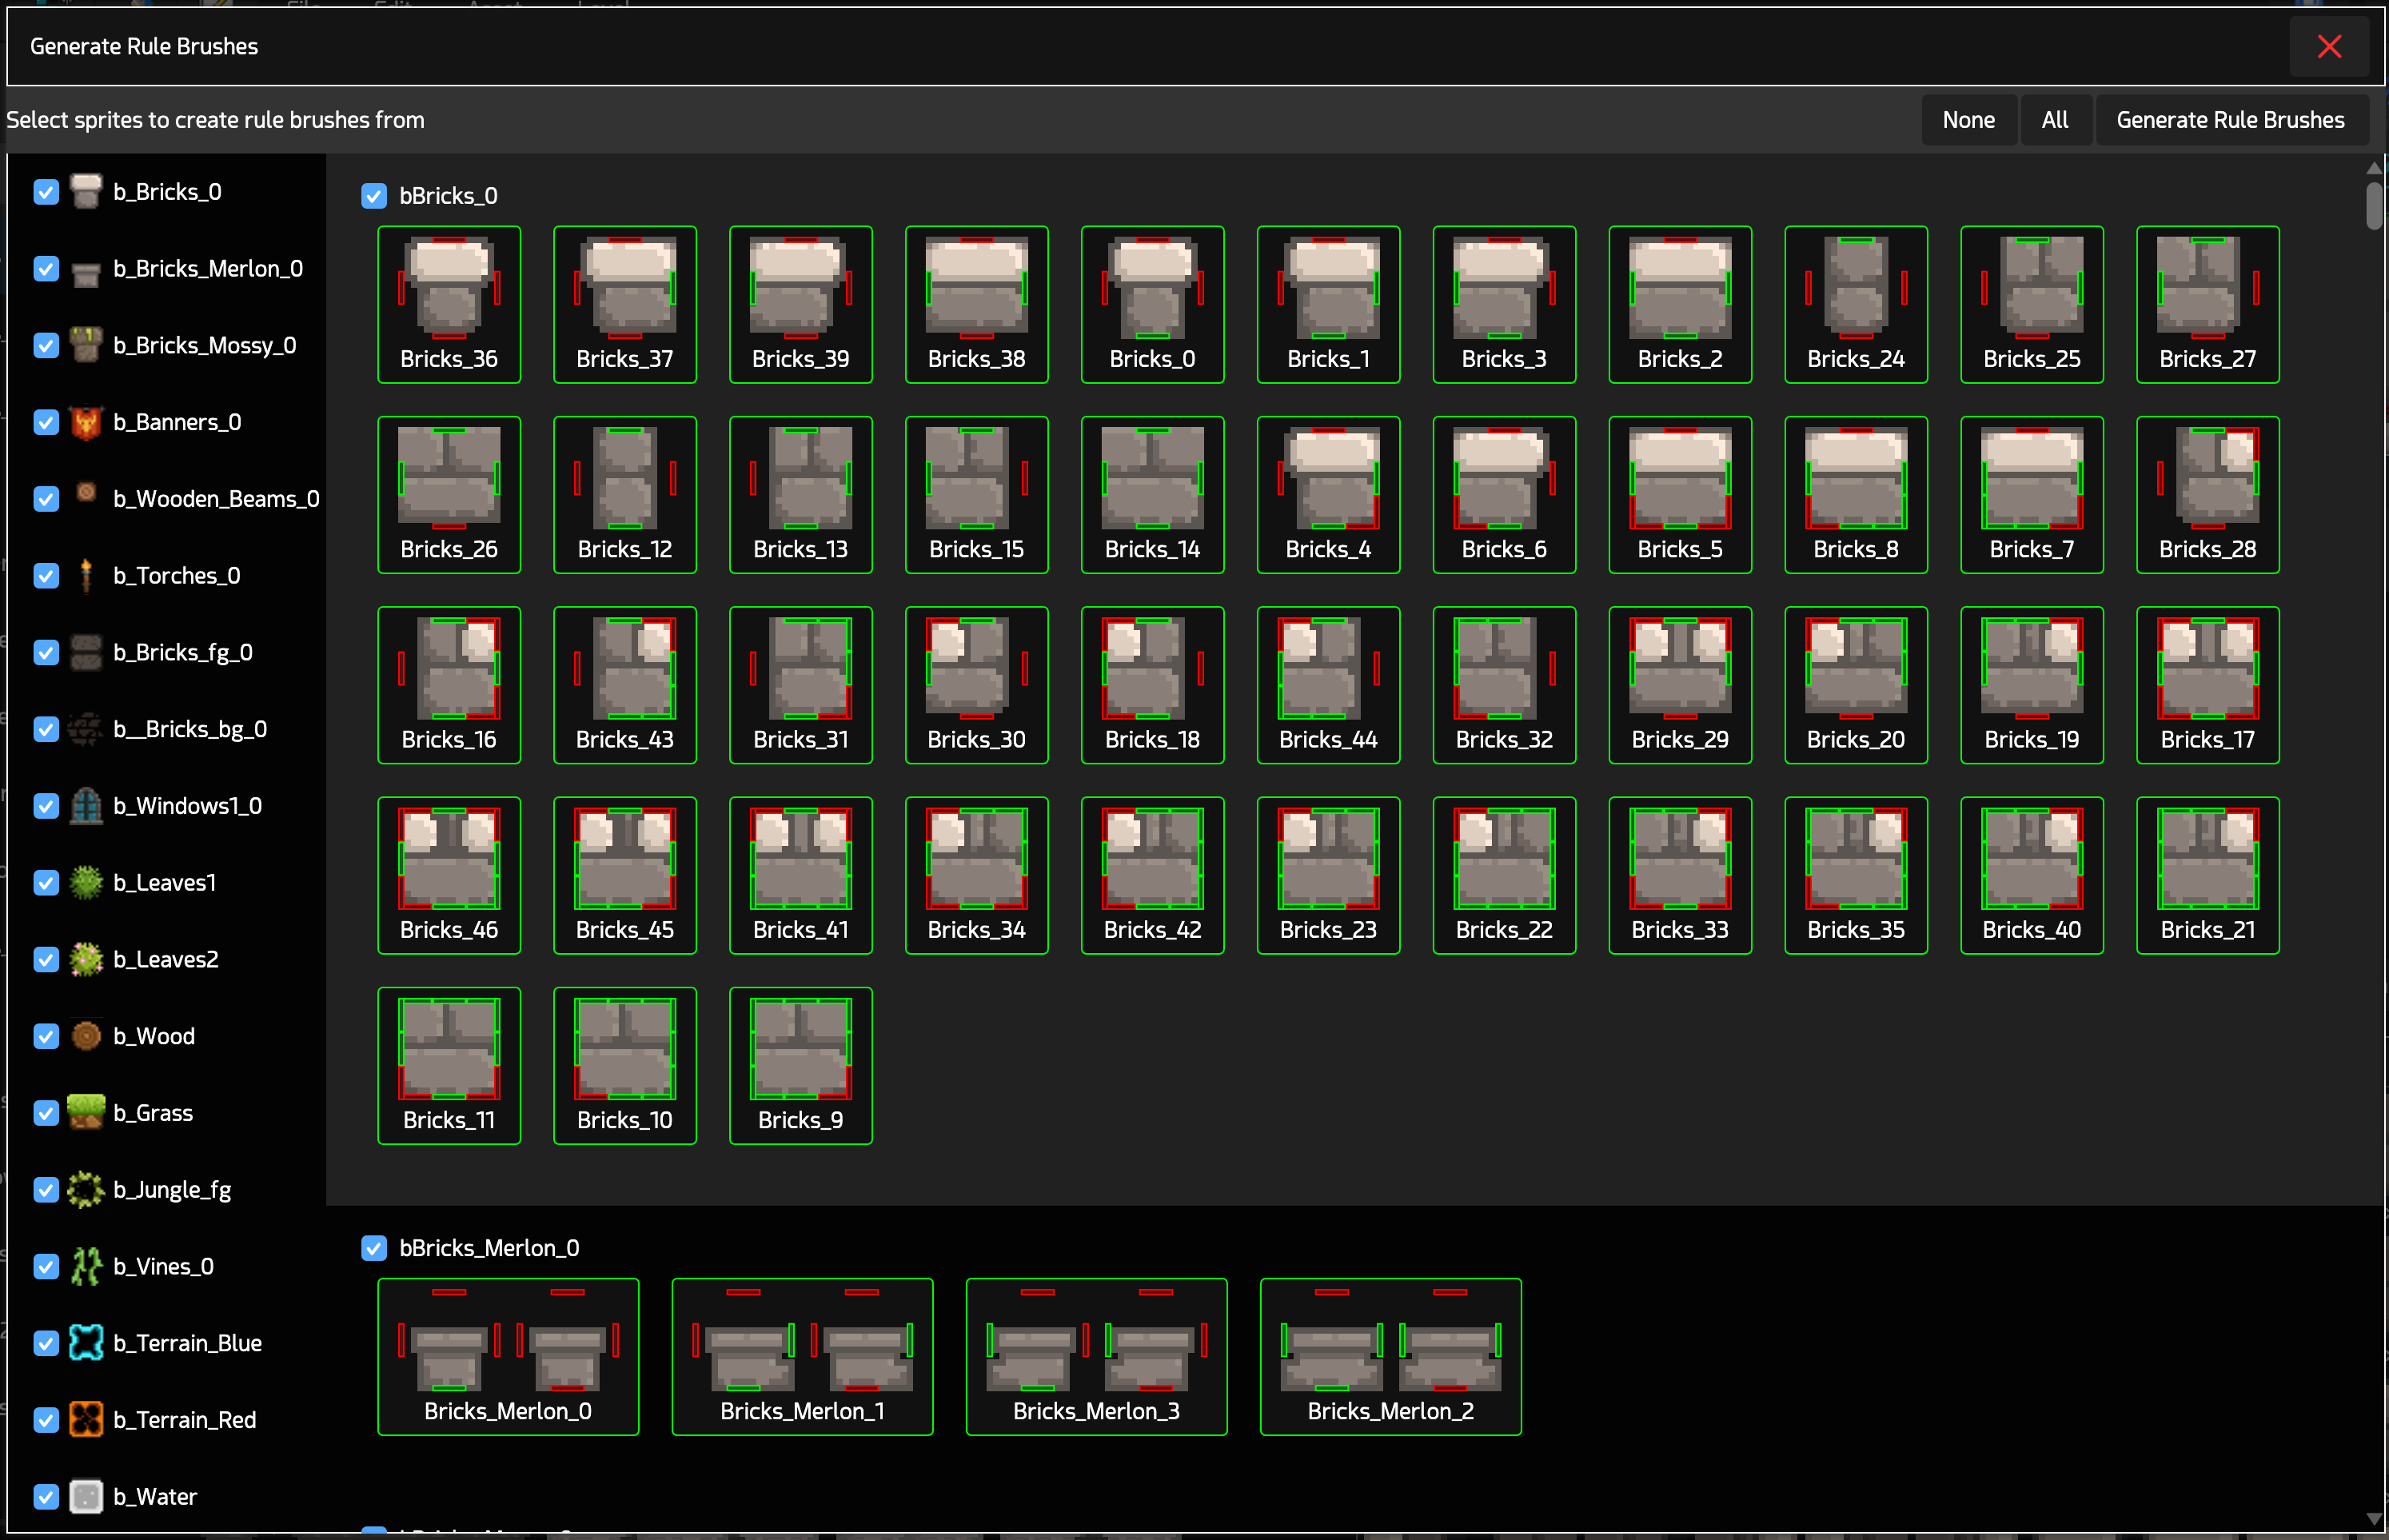
To export and generate rule brushes, click the gears button, which opens the Generate Rule Brushes dialog.